Using GOnnect
First start
There are a couple of ways to start the app:
-
Start menu/application launcher: type "GOnnect"
-
GNOME desktop search (if configured, see desktop search configuration)
-
Following a
tel:orsip:link (if configured, see URL handler configuration) -
CLI:
flatpak run de.gonicus.gonnect
The app usually starts in background, unless showing the main window on startup is enabled (see settings). Note the GOnnect icon in the system tray. Closing the main window does not quit GOnnect, so you can still be reached.
To bring back the main window:
-
click the GOnnect icon in the system tray once, or
-
right-click it and select .
Setting up your headset
-
Connect your headset, preferably before starting GOnnect.
-
If GOnnect does not know your devices yet, the dialog Unknown audio environment appears.
-
Select your headset as Input device (microphone) and Output device (speaker).
-
With Output device for ring tone you decide where the phone rings, for example on the speakers of your computer.
-
Click Ok.
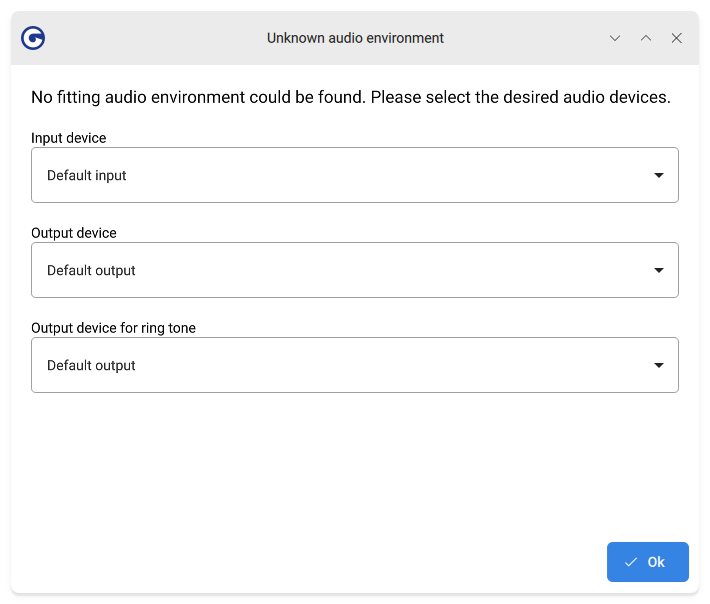
GOnnect remembers this selection as an audio environment. If you use different headsets in the office and at home, GOnnect asks once at each place. See also audio settings.
If your headset has buttons, you can usually accept and end calls and mute the microphone with them (see how the headset driver works).
Overview
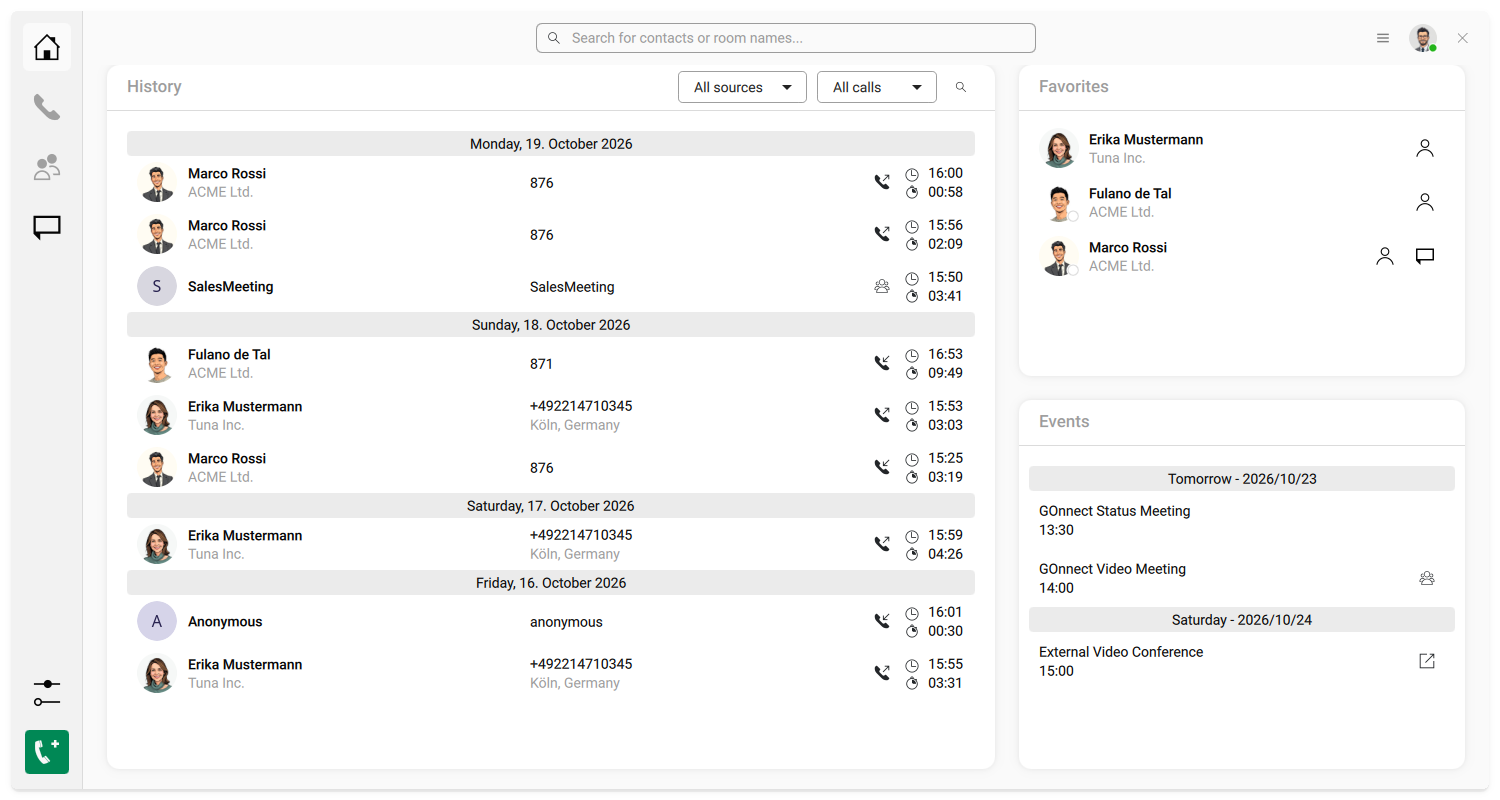
The main window has the following parts:
- The search and dial input box at the top
-
This is the main entry point to start a call, join a video conference, open a chat or search for contacts. Next to it on the right are the App menu (three lines) and your own avatar with your presence status.
- The vertical menu bar on the left
-
Switch between the home screen, the active call, the active video conference and the chat. Pages you have added yourself are shown there, too. At the bottom you find the settings and the emergency call button if set up.
- The center part
-
Shows the content of the selected topic of the vertical menu bar. The above image shows the home screen with the widgets Events, Favorites, History and a chat room.
- Status bar at the bottom right
-
Toggles like call forwarding or queue login if set up.
The vertical menu bar only shows icons. Hover over an icon to see its label.
The search and dial input box
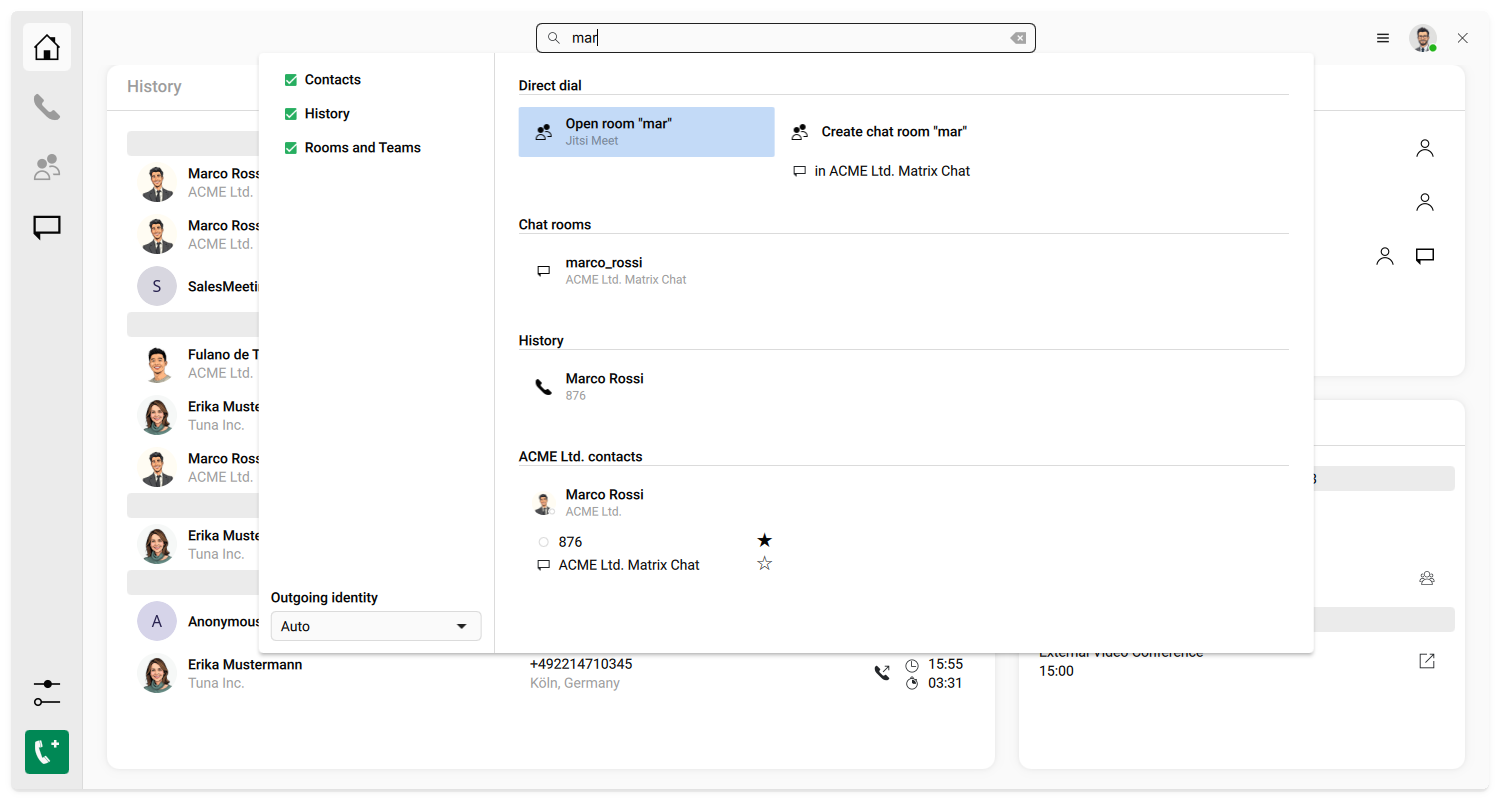
A central item of GOnnect is the search and dial input box on the top. Click into it or press Ctrl+F or Ctrl+K.
-
Enter a phone number and select Call "<number>" in the Direct dial section to start a call.
-
Enter a room name and select Open room "<room name>" to join a video conference if set up.
-
Enter a name and pick one of the search results. Results include contacts with their phone numbers, chat rooms, and your history.
The search is fuzzy: "Jon Do" also finds "John Doe".
At the bottom left of the search results is the dropdown box Outgoing identity. It defines the number the called person sees, for example your direct dial or the central number of your company if set up. Auto lets GOnnect choose based on the dialed number, Default uses the setting of your phone system. Please refer to the corresponding section to understand the concept and learn how to configure identities.
The vertical menu bar
The vertical menu has buttons to change the content, which is shown in the center part of the window.
- Home
-
The home screen is the default view and is active on startup. The displayed widgets can be customized (see next section).
- Call
-
The phone call screen is only selectable if there are active phone calls.
- Conference
-
The video conference screen is only selectable if you have joined a video conference.
- Chat
- Settings
-
The settings screen allows you to change the GOnnect settings, see User settings.
- Emergency call
-
The green button with the emergency telephone symbol at the bottom if set up opens the page Emergency call with the emergency contacts configured by your administrator. Opening the page does not affect your calls.
Clicking one of the emergency contacts on that page ends all current calls and immediately starts an emergency call.
The home screen and the customizable layout
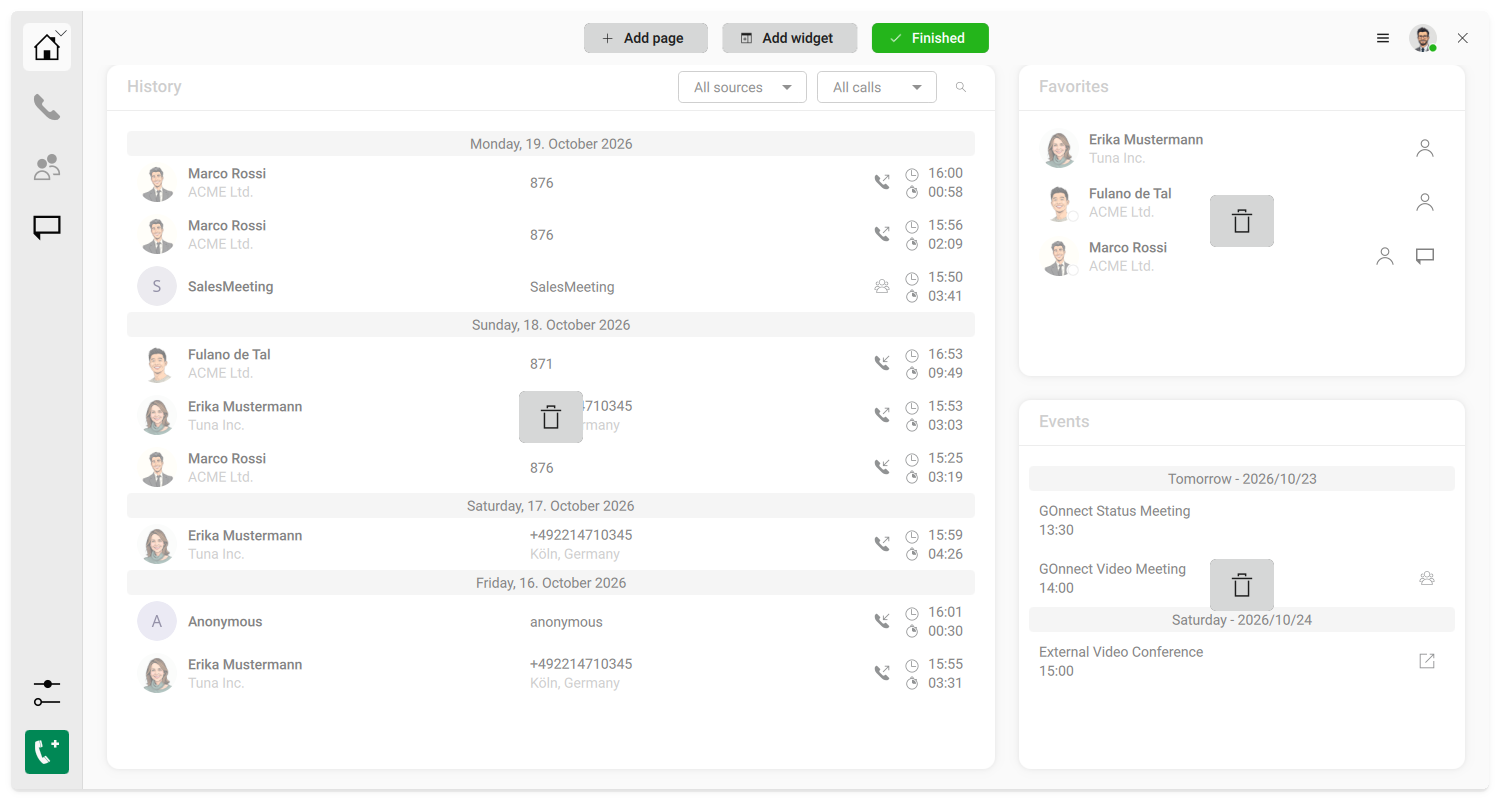
GOnnect provides a customizable layout. You can place and resize widgets as you like.
-
Open the App menu at the top right.
-
Select Customize UI.
-
Use Add widget to add widgets, for example Activities or a chat room if set up. You can move, resize and delete existing widgets, or use Add page to add a page to the vertical menu bar.
-
Click Finished.
History widget
The History widget displays the latest entries of the call history. This list will be empty the first time you start the app, but will then continue to fill.
-
Double-click on a row to call back or open the video conference room.
-
Right-click on a row for further options, for example Add favorite, Chat if set up, Block for 8 hours or Remove.
-
If a call was forwarded to you, the history shows the route of the call.
Old entries are removed automatically after a number of days, which you can set in the settings.
Favorites widget
Favorites are your speed dial for people you want to reach often.
-
Right-click a person in the History or click the star next to a search result.
-
Select Add favorite.
-
The person now appears in the Favorites widget and in the menu of the system tray icon.
Events widget
The Events widget shows a list of the upcoming appointments if set up.
An entry may contain a group symbol, if the location of the appointment contains a link to the configured video conference solution. A double-click opens the room in the video conference tab. Shortly before the appointment starts, a notification reminds you.
If the appointment contains an URL as location, which does not correspond to the configured video conference solution, a link symbol is shown. A double-click opens the link in your default browser.
The widget uses the Evolution Data Service, if present, and additional CalDAV sources can be configured also.
Calls
You have several options to initiate a call:
-
The search and dial input field in the main window
-
Double-click on an item in the history
-
The phone button of a favorite
-
The Call button in a direct chat if set up
-
Right-click on the app icon or system tray icon (if available) and select a favorite
-
Using the GNOME desktop search (if configured)
-
Invoking a
tel:orsip:link, for example in the browser (if configured). The first time, your desktop asks which application to use. Select GOnnect. -
Using the shell
Active call(s)
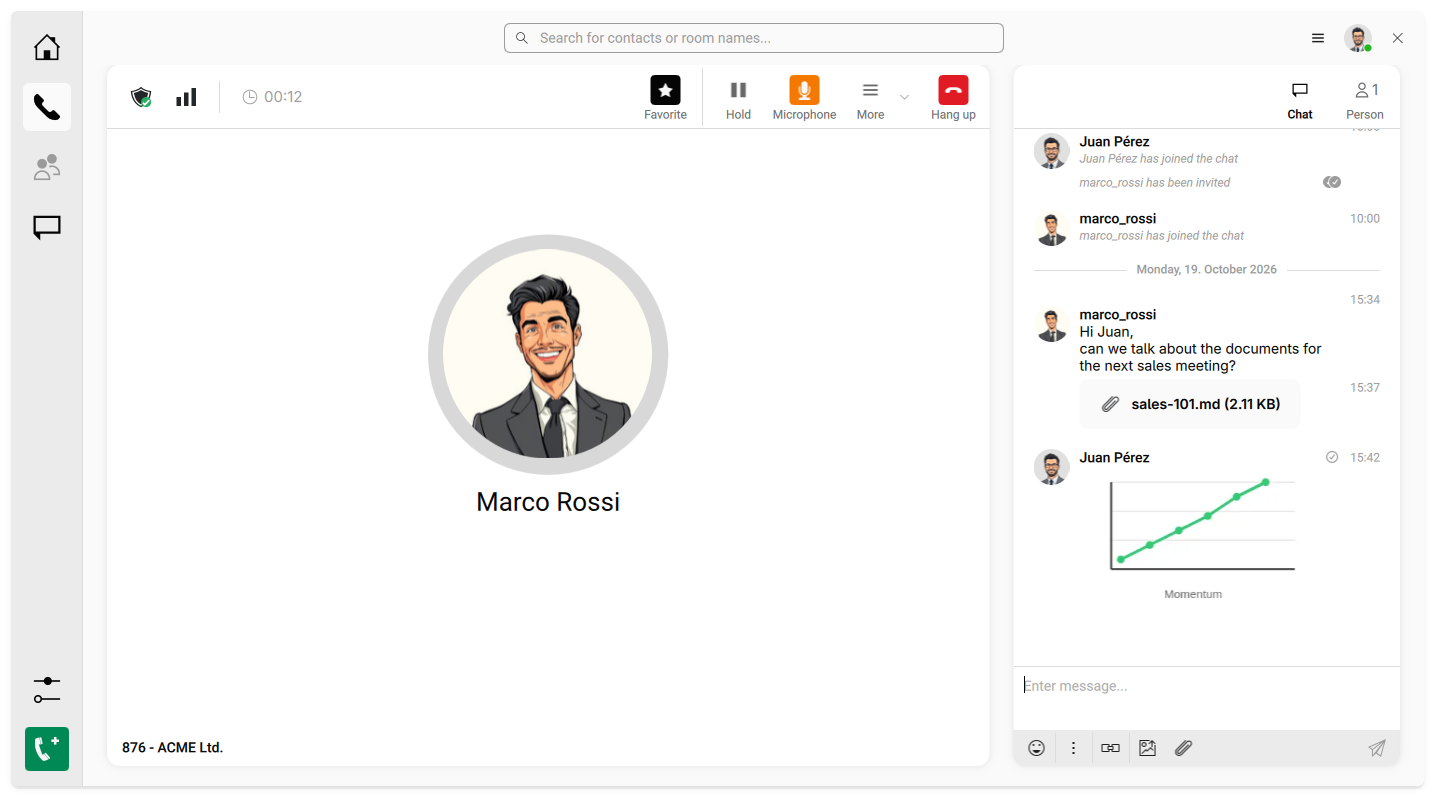
The call screen shows who you are talking to. The button bar at the top has the following buttons:
-
Hold puts the call on hold, a second click resumes it.
-
Microphone mutes you.
-
Hang up ends the call.
-
More lets you choose another microphone (Microphone…) or speaker (Output…).
A small symbol shows whether the call is encrypted and how good the connection is. Hover over it to see details.
If you already have a chat with the other person if set up, the side panel on the right shows a Chat tab next to Person(s). This is handy to quickly send a link or a file during the call.
DTMF (dial tones)
Acoustic dial tones might be needed when calling a hotline with an automatic response or entering the PIN when joining a conference call. When the call window is focused and the specific call is selected, simply press the number buttons on your keyboard to send the appropriate sound.
If you know the digits in advance, add them to the number, separated by a comma, for example
0301234567,1234#. GOnnect sends the digits as soon as the call is established.
Incoming calls
When someone is calling you, a desktop notification will pop up, allowing you to accept or reject the call. Clicking on the notification itself will open the call screen.
If the call has been forwarded to you, the notification shows Via: and the route of the call. This way you can see, for example, that someone actually called the central number.
Multiple calls
GOnnect can handle several calls at the same time.
For example, when you have an active call, another call might come in and you hear a short signal tone. Depending on the settings for handling this (the client might just send "busy" and ignore it, if you have chosen this option), you can simply accept the new call like any other. Any existing calls will automatically be put on hold.
The same applies when you have an ongoing call and start a new one (enquiry). The previous call will be put on hold automatically while starting the new one.
All calls are listed in the side panel Person(s) on the right. Select a call there to switch between the calls.
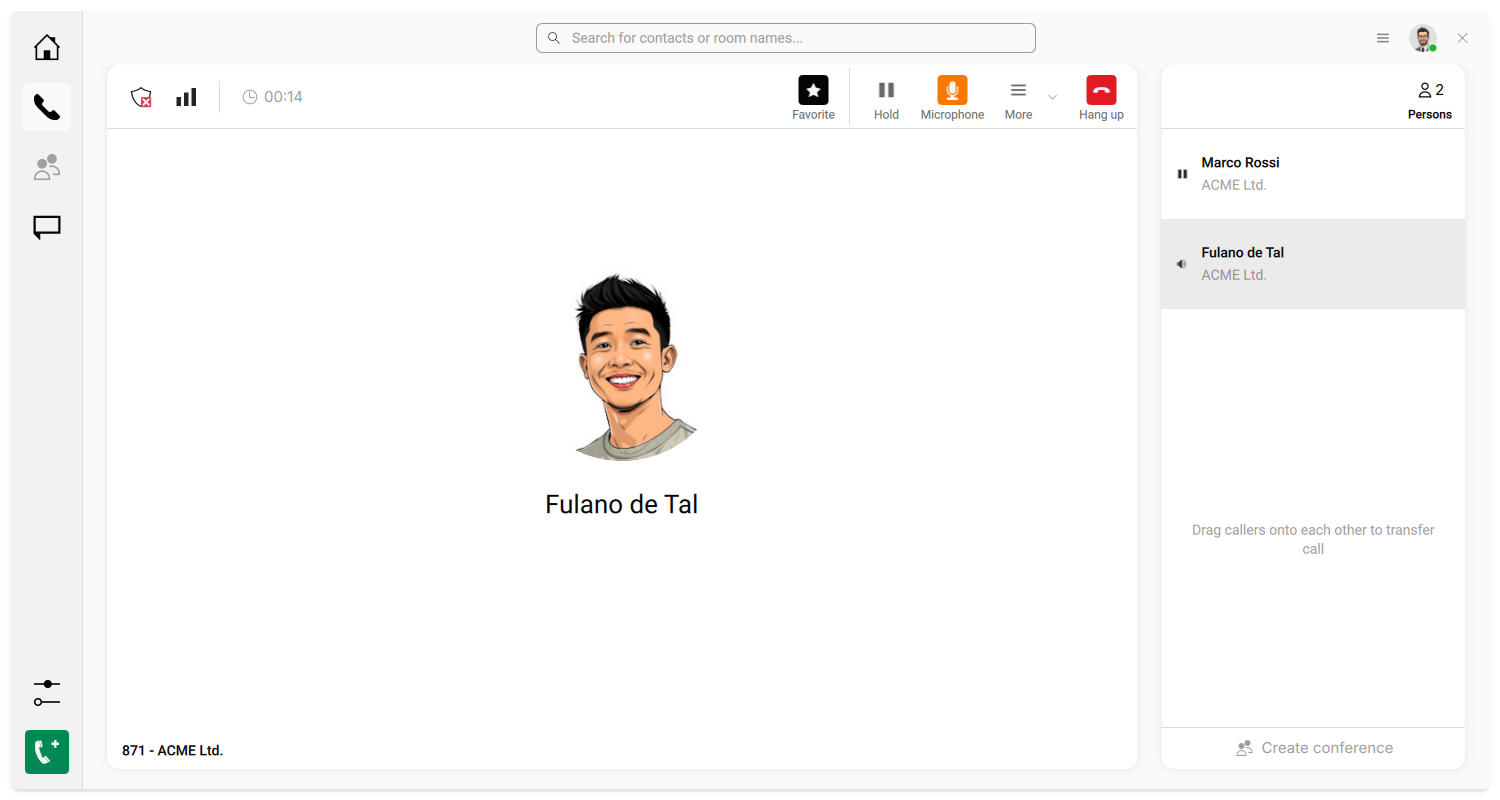
Once you have two (or more) active calls, you can end individual calls or choose one of the two options described in the next paragraphs.
With exactly two active calls, you can start an ad-hoc three-party conference with the button Create conference. Please be aware that the conference will be routed by the client that started it (the host). If the host has connection issues or ends the conference, it will affect the communication between the other participants as well.
The other option is call transfer. In the side panel Person(s), simply drag and drop one list item onto the other. Those two people will now continue their call on their own, and you are no longer part of the call.
Jitsi Meet upgrade
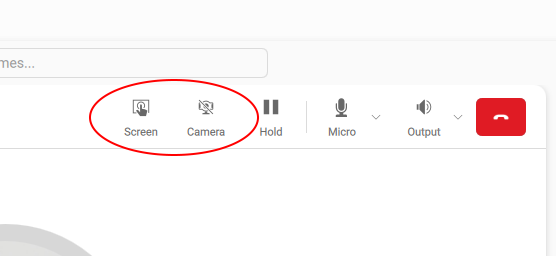
When all participants of a phone call use the GOnnect client and have that option enabled in the settings, the buttons Camera and Screen will appear in the call window to upgrade the call to Jitsi Meet. The call is transferred seamlessly to a Jitsi conference, and the conference screen will be shown. If you had a direct chat with the other person, it stays available in the side panel.
This is very useful if you decide to share your screen during an ongoing call or want to invite more people to the conversation.
Video conferences
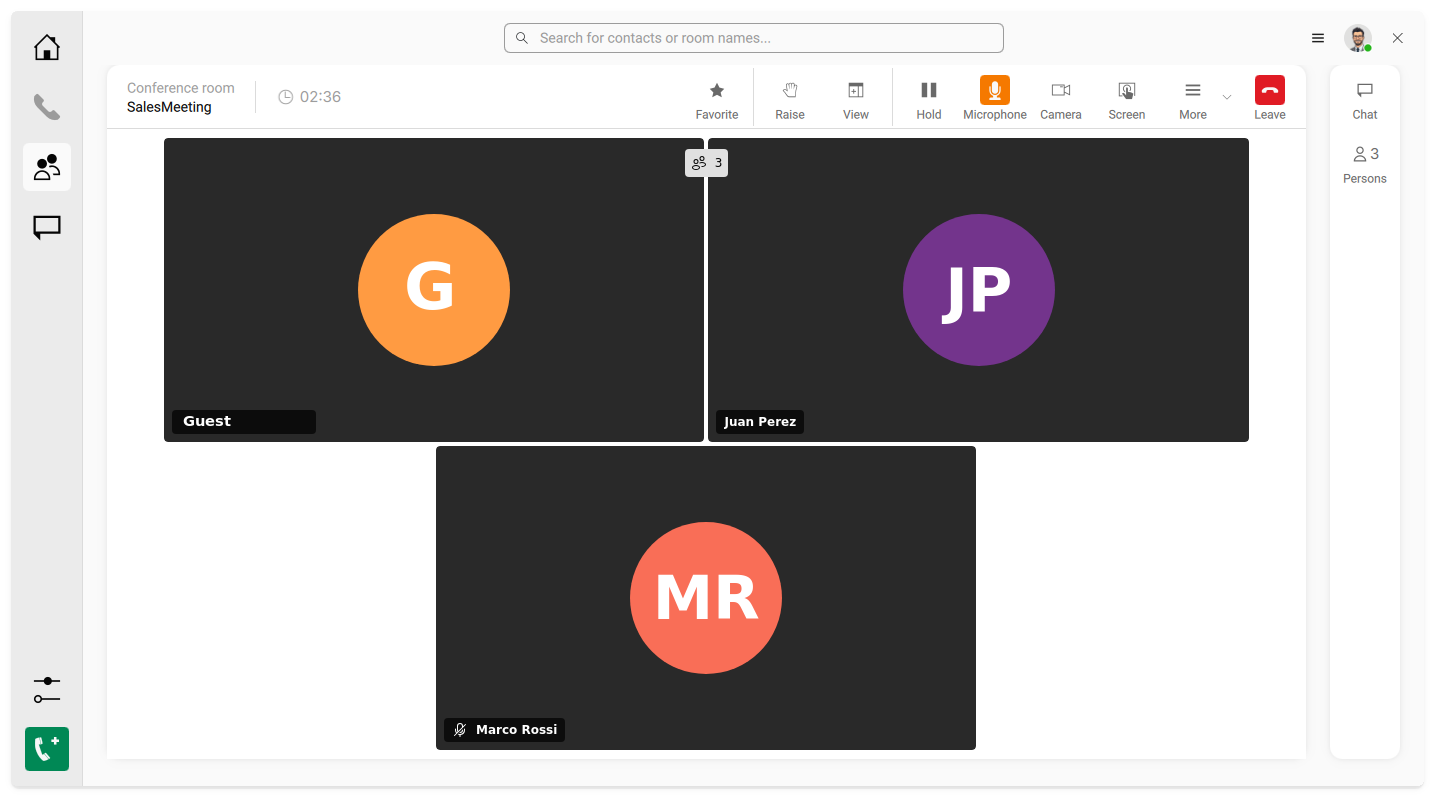
If GOnnect is configured for Jitsi, a video conference can be started by entering a room name in the search field and then selecting the button Open room "<room name>". Everybody who enters the same room name joins the same room. Appointments with a conference link and chat rooms with a conference (see Chat and video conferences) open the conference directly.
The conference toolbar and its More menu offer, among other things:
-
Share screen or Share window
-
Raise hand, if you want to say something
-
View to switch between the tile view and the speaker view (the choice is remembered)
-
a chat for all participants of the conference
-
Copy room link to invite others
-
the dial-in numbers for participants without a computer if set up
-
Leave conference or End conference for all
If somebody waits in the lobby, GOnnect asks: "<name> wants to join the conference. Can they join?". Accept to let the person in.
Your presence status
Click your own avatar at the top right to set your status to Available, Away or Do not disturb. Use Set status text… to add a short note, for example "In a meeting until 2 pm". The same menu is available in the system tray icon.
Keyboard shortcuts
| Key | Action |
|---|---|
Ctrl+F or Ctrl+K |
Open the search |
F11 |
Toggle full screen |
The App menu shows all shortcuts under Shortcuts…. Depending on the configuration, you can also control GOnnect with global shortcuts while another application is in the foreground, for example to hang up or to redial the last number.